 Skip to content
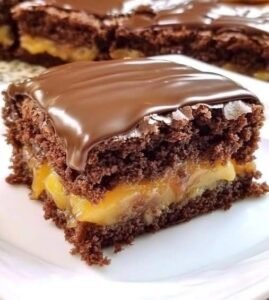
If you are looking for an incredible dessert that combines the silky smoothness of gourmet pastry cream with the deep richness of a dark chocolate glaze, you have come to the right place today. The chocolate Boston cream cake bar is a magnificent twist on the traditional American pie that reimagines classic bakery flavors into easy to slice rectangular portions. This specific recipe focuses on stacking three wonderful layers together, starting with a soft, airy sponge cake base that resembles the fluffy texture seen in image_d125dc.jpg, followed by a thick layer of homemade vanilla custard, and finished with a glossy chocolate shell. It transforms basic baking ingredients into a beautiful, multi layered masterpiece that looks highly complex but can be achieved easily by anyone working in a home kitchen.
People all over the world are absolutely falling in love with these dessert bars because they deliver the ultimate trifecta of textures and flavors in every single bite. Instead of dealing with the stress of assembly and slicing a round, unstable cream pie, this bar format allows you to create neat, beautifully defined layers that hold their shape perfectly when cut into clean squares. The clever layering ensures that the soft sponge cake absorbs just enough moisture from the vanilla custard to become incredibly tender, while the firm chocolate glaze on top provides a satisfying richness that rounds out the sweetness beautifully. It is a fantastic way to satisfy your deepest cravings for a high quality bakery treat while creating a fun, crowd pleasing dessert that gets everyone smiling at the dinner table.
You should definitely make this wonderful recipe whenever you want to celebrate a family birthday, impress your friends at a weekend potluck, or surprise your loved ones with a comforting weekend baking project. On warm summer afternoons or cozy winter nights when you want to bring absolute joy to your household, the process of whisking fresh custard and melting dark chocolate brings an instant wave of relaxation and creative fulfillment to your routine. While it is certainly a decadent indulgence, you can easily enjoy a modest square bar as a wonderful energy boosting reward after a long week of intense fitness training because the high quality eggs and milk provide a healthy dose of natural protein. Whatever your personal reason might be, sliding a platter of these beautiful chilled bars onto your counter will create an unforgettable moment of pure happiness for your family.
Ingredients You Will Need
To create this impressive and decadent layered dessert, you will need to gather a few simple components from your local grocery store. The ingredients are divided into three clear sections for the sponge cake base, the creamy vanilla filling, and the glossy chocolate glaze to keep your workspace completely organized.
For the Sponge Cake Base
-
Large fresh eggs at room temperature: 3 pieces
-
Granulated white sugar: 100 grams
-
All purpose flour sifted well: 100 grams
-
Whole milk at room temperature: 30 milliliters
-
Pure vanilla extract: 5 milliliters
-
Fine sea salt: 1 pinch
For the Creamy Vanilla Custard Filling
-
Whole milk: 480 milliliters
-
Large egg yolks beaten: 4 pieces
-
Granulated white sugar: 100 grams
-
Cornstarch for thickening: 35 grams
-
Unsalted butter softened: 30 grams
-
Pure vanilla extract: 10 milliliters
For the Glossy Chocolate Glaze
-
High quality dark chocolate chips: 150 grams
-
Heavy whipping cream: 120 milliliters
-
Light corn syrup for a beautiful shine: 15 milliliters
Step by Step Method
Creating this layered masterpiece is highly satisfying and can be completed easily if you follow these detailed steps in order. Even if you are a complete beginner who has never made a homemade custard before, these simple instructions will guide you to a flawless result on your very first try.
Step 1: Baking the Sponge Cake Base
First, preheat your kitchen oven to one hundred seventy degrees Celsius and prepare an oblong baking pan by rubbing a small drop of oil across the interior surfaces and lining the bottom with a sheet of clean parchment paper.
Place your three large room temperature eggs and one hundred grams of sugar into a clean mixing bowl and use an electric hand mixer to beat them on high speed for eight minutes until the mixture turns into a thick, pale cream that forms ribbons when you lift the beaters.
Gently fold your one hundred grams of sifted all purpose flour and one pinch of fine sea salt into the whipped egg cream using a silicone spatula, moving in slow circles from the bottom of the bowl to the top so you do not pop the air bubbles.
Stir your thirty milliliters of whole milk and five milliliters of vanilla extract into the batter, then pour the smooth mixture into your lined baking pan and level the top surface gently with your spatula.
Bake the sponge base in your preheated oven for twenty to twenty two minutes until the top turns a beautiful light golden brown and a toothpick inserted into the center comes out clean. Remove the pan from the oven and let the cake cool completely inside the pan.
Step 2: Cooking the Vanilla Custard Filling
While your cake base is cooling on the counter, pour the four hundred eighty milliliters of whole milk into a medium saucepan and heat it over a medium flame until it starts to simmer gently around the edges of the pan.
In a separate heatproof bowl, whisk together the four egg yolks, one hundred grams of granulated sugar, and thirty five grams of cornstarch until the mixture forms a smooth, thick yellow paste with no dry lumps remaining.
Slowly pour a small splash of the hot simmered milk into your egg yolk paste while whisking continuously to temper the eggs, which prevents them from scrambling when they meet the heat of the pan.
Gradually pour the tempered egg mixture back into the saucepan with the remaining hot milk, place the pan back over a low flame, and whisk the custard continuously without stopping for about three to five minutes.
As the custard heats, it will suddenly thicken into a rich, velvety pudding texture that bubbles slowly. As soon as it thickens, remove the saucepan from the heat instantly and stir in the thirty grams of unsalted butter and ten milliliters of vanilla extract until completely melted.
Pour the hot custard directly over the cooled sponge cake base inside your baking pan, using your spatula to spread it into an absolutely even, flat layer that covers the entire surface of the cake from corner to corner.
Place a sheet of plastic wrap directly onto the surface of the hot custard layer to prevent a tough skin from forming on top, then place the entire pan into your refrigerator to chill completely for at least two hours until firm.
Step 3: Creating and Adding the Chocolate Glaze
Once the custard layer is completely cold and firm to the touch, prepare your glossy chocolate glaze by placing the one hundred fifty grams of dark chocolate chips into a heatproof glass bowl.
Heat your one hundred twenty milliliters of heavy whipping cream in a small saucepan over a medium flame just until it reaches a gentle boil, then pour the hot cream directly over the chocolate chips.
Let the hot cream and chocolate sit undisturbed for two minutes so the heat melts the cocoa solids, then add the fifteen milliliters of light corn syrup and stir the mixture gently with a spoon until it transforms into a smooth, glossy glaze.
Remove the plastic wrap from your chilled custard layer and pour the warm chocolate glaze evenly over the top, tilting the baking pan gently back and forth so the chocolate coats the entire surface in a beautiful mirror finish.
Place the completed pan back into your refrigerator for one final hour to allow the chocolate glaze to set into a firm shell. Once the glaze is set, lift the cake out of the pan using the edges of the parchment paper and slice it into beautiful rectangular bars using a sharp knife dipped in hot water.
Why This Recipe Is Special
This recipe stands out from traditional frosted cakes because it celebrates the elegant balance of clean, distinct textures that work together to create a superior dessert experience. The light sponge cake serves as a wonderful airy foundation that prevents the dessert from feeling overly heavy, allowing the rich vanilla custard to take center stage without overwhelming your palate.
From a health standpoint, making this multi layered treat at home gives you absolute control over the quality of your dairy and cocoa ingredients, allowing you to completely avoid the artificial thickeners, hydrogenated fats, and high fructose corn syrup found in commercial snack cakes. By utilizing real egg yolks and whole milk, you provide your body with natural sources of calcium, vitamin D, and essential proteins.
Another reason this recipe is so special is its exceptional visual presentation when sliced into individual bars for your guests. The clean contrast between the golden sponge base, the thick ivory custard filling, and the dark chocolate glaze creates a striking pattern that looks incredibly elegant on a serving platter, making it look like it came from a professional European pastry shop.
Extra Tips for Better Taste
If you want to take your homemade cake bars to an even higher level of culinary excellence, you can try a few creative adjustments to suit your personal preferences. When cooking your vanilla filling, try using a fresh vanilla bean pod instead of extract by scraping the dark seeds directly into the simmering milk, which infuses the custard with a spectacular deep aroma and beautiful black flecks.
You can also enhance the flavor of your sponge cake base by preparing a simple espresso syrup to brush over the cake before adding the custard. Simply dissolve a teaspoon of instant espresso powder in fifty milliliters of warm sugar water and apply it lightly to the sponge layer, which introduces a wonderful coffee note that contrasts beautifully with the sweet vanilla.
For an extra rich chocolate experience on top, you can replace the standard dark chocolate chips with a premium block of seventy percent dark cocoa chopped into small pieces. The natural bitterness of high quality dark chocolate cuts through the sweetness of the custard layer beautifully, creating a sophisticated balance that adult guests will absolutely adore.
If you struggle to get perfectly clean edges when slicing your bars, make sure your knife is thoroughly prepared before every single cut. Dip the metal blade into a tall container of boiling hot water for ten seconds, wipe it completely dry with a clean cloth, and slice straight down through the layers in one continuous motion without sawing back and forth.
For a delightful texture contrast that breaks up the softness of the cream, you can sprinkle a handful of toasted sliced almonds or cocoa nibs over the top of the wet chocolate glaze right before placing it into the refrigerator to set. This simple addition provides a magnificent nutty crunch that elevates the eating experience significantly.
Final Thoughts
Baking complex looking layered desserts should never feel overwhelming for a beginner, and these chocolate Boston cream cake bars prove that you can achieve professional bakery results using basic kitchen tools and patient assembly steps. It is a joyful, rewarding, and highly versatile recipe that turns classic pastry components into a beautiful modern finger food that your friends and family will talk about for weeks. Do not worry if your custard layer feels a little soft on your first attempt, as mastering the starch thickening process simply takes a bit of time and steady heat control. Gather your mixing bowls, whisk your custard with care, and enjoy the wonderful process of building these beautiful layers of happiness in your kitchen today.
Nutrition Details
Here is a clear breakdown of the estimated nutritional content for this layered recipe. The numbers represent the values for one individual rectangular bar when the entire pan is divided into eight equal portions.
| Nutrient Type | Amount Per Serving | Percentage of Daily Value |
| Total Calories | 345 calories | 17 percent |
| Protein Content | 6 grams | 12 percent |
| Total Carbohydrates | 44 grams | 15 percent |
| Dietary Fiber | 1.5 grams | 6 percent |
| Total Fat | 16 grams | 21 percent |
| Sugars | 28 grams | 28 percent |
| Cholesterol | 145 milligrams | 48 percent |
| Calcium | 110 milligrams | 8 percent |
Disclaimer
Please remember that every human body is completely unique and individual health results may change depending on your personal metabolism, daily movement patterns, and overall food habits. The nutritional information provided in this article is an estimate calculated using standard ingredient databases and could vary slightly depending on the specific fat content of your milk or the brand of chocolate you select at the grocery store. It is always a wise idea to consult with a qualified medical professional or a registered dietitian before making significant changes to your daily eating plan or fitness lifestyle.
The Importance of Tempering Egg Yolks
When you are creating a traditional custard filling from scratch, the process of tempering your egg yolks is the single most important step for achieving a smooth texture. If you were to dump cold raw egg yolks directly into a saucepan filled with boiling hot milk, the intense heat would cook the egg proteins instantly, creating tiny pieces of hard scrambled eggs floating throughout your dessert.
By gradually whisking a small stream of hot milk into the egg paste beforehand, you slowly raise the temperature of the yolks without shocking them. This allows the proteins to remain liquid and flexible so they can blend smoothly with the rest of the milk, creating a completely velvety cream filling that coats your spoon beautifully without requiring a strainer.
Choosing the Best Pan for Multi Layered Bars
The type of baking pan you select for this project will play a major role in how easily you can assemble and serve your finished bars. A metal rectangular baking pan with sharp, straight corners is highly recommended because it allows your sponge cake to form perfect edges that hold the custard securely without any sloping gaps along the sides.
Additionally, always ensure your parchment paper is long enough to extend up and over the two long sides of the pan, creating handy paper handles. Once your chocolate glaze is completely set in the refrigerator, you can simply grab these paper handles and lift the entire dessert out of the metal pan cleanly onto a cutting board, allowing you to slice perfect geometric bars without scraping your bakeware.
Mastering Cornstarch Activation in Custards
Beginner bakers are sometimes confused when their homemade custard looks thick while warm but turns watery and runny after sitting in the refrigerator for a few hours. This thinning problem occurs because cornstarch requires a specific amount of heat and time to activate its thickening properties completely and neutralize a specific enzyme found in raw egg yolks.
To ensure your custard sets into a firm layer that can be sliced cleanly into bars, always allow the mixture to reach a full boil over a low flame while whisking vigorously. Once you see large bubbles popping on the surface of the thick cream, continue cooking and whisking for one full minute without stopping, which completely cooks the starches and guarantees a stable filling that will hold its shape perfectly.
Creative Flavor Twists for Advanced Bakers
Once you have mastered the classic vanilla and chocolate combination outlined in this guide, you can begin experimenting with fun flavor variations to surprise your guests at holiday celebrations. For a festive autumn version, you can stir a tablespoon of pumpkin pie spice and a spoonful of pure pumpkin puree directly into the custard layer while it is thickening on the stove.
For a bright berry variation that is perfect for spring garden parties, you can arrange a single layer of fresh red raspberries or sliced strawberries directly on top of the sponge cake base before pouring the hot custard over the fruit. The tartness of the fresh berries breaks up the rich sweetness of the cream layer beautifully, providing a wonderful burst of freshness that balances the dark chocolate glaze.
Preserving the Gloss of Your Chocolate Glaze
The visual signature of a spectacular Boston cream dessert is a mirror like chocolate glaze that catches the light beautifully on your serving platter. To keep your glaze looking shiny and attractive instead of dull and cloudy, the addition of a small spoonful of light corn syrup or pure liquid glucose is a highly effective baker secret.
The sugar molecules in the corn syrup prevent the melted cocoa fats from crystallizing into a matte finish as they cool down inside your refrigerator, keeping the glaze flexible and glossy. Additionally, make sure your heavy cream is hot but not boiling aggressively when you pour it over your chocolate chips, as overheating chocolate can cause the cocoa butter to separate, resulting in an oily appearance.
Storing Your Cake Bars Safely
Because this recipe contains a significant amount of fresh dairy, eggs, and cooked starch, proper refrigeration is absolutely mandatory for keeping your cake bars safe and delicious for several days. Never leave the finished bars sitting on your kitchen counter at room temperature for more than one hour, especially during warm summer weather.
Store any leftover bars inside a sealed airtight plastic container with small sheets of parchment paper placed between the pieces so they do not stick together, and keep them inside your refrigerator for up to four days. The sponge cake base will actually continue to absorb moisture from the custard layer as it sits, making the bars taste incredibly rich, moist, and unified on the second and third day of storage.