 Skip to content
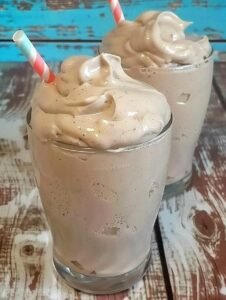
Creating the perfect chocolate milkshake topped with thick whipped cream is like capturing a little bit of magic in a glass. This recipe is all about bringing back that classic soda fountain feeling right into your own kitchen with very simple steps. You do not need fancy equipment or a professional culinary degree to master this sweet treat because it relies on the quality of basic ingredients and a bit of love. Many people think that a great milkshake is just milk and syrup but there is a real art to getting the thickness and the richness just right so it feels like a luxury. This specific guide will teach you how to balance the deep cocoa flavors with the creamy texture of high quality vanilla ice cream to create a drink that is consistent every single time. It is a wonderful way to treat yourself after a long day or to surprise your family with something that looks like it came from a professional dessert shop. Understanding the base of the shake and how it interacts with the cold temperature is the first secret to making a drink that does not melt too fast or stay too chunky. We are going to explore every little detail from the choice of milk to the final swirl of cream so you feel confident in your blending skills.
The reason people absolutely love a chocolate milkshake is because it hits every single note of comfort and nostalgia that we crave as humans. There is something deeply satisfying about the cold temperature hitting your tongue followed by the intense and smooth flavor of chocolate that lingers beautifully. It reminds many of us of childhood summers spent at the beach or weekend trips to the local diner where the tall silver mixing cups were a sign of a good time coming. Beyond the taste it is the texture that really wins hearts because a well made shake is thick enough to require a spoon but smooth enough to travel through a straw. The addition of a mountain of whipped cream on top adds a light and airy contrast to the dense shake underneath which makes every sip a different experience. It is a universal favorite that transcends age because whether you are five years old or eighty five years old a chocolate shake brings a genuine spark of joy. People also love how customizable it is because you can make it as dark or as sweet as you personally prefer without ruining the integrity of the recipe. It is the ultimate crowd pleaser that brings smiles to faces before the first sip is even taken.
You might wonder when the best time is to whip up this decadent creation and the truth is that any moment can be made better with chocolate. Many people choose to make this as a celebratory reward after reaching a personal goal like finishing a tough project at work or completing a big house cleaning task. It serves as an emotional pick me up when you are feeling a bit down because the natural compounds in chocolate are known to boost your mood and provide a sense of well being. For those who are into fitness and heavy lifting this can actually serve as a high calorie recovery meal when you need to replenish your energy stores quickly after a very intense leg day or a long run. It is also the perfect centerpiece for a casual movie night with friends or a birthday party where you want to serve something impressive but easy to manage. Making a milkshake is also a fun activity to do with children because they love watching the blender turn solid ice cream into a swirling vortex of chocolatey goodness. There is no wrong reason to enjoy a glass of this liquid gold because life is short and we all deserve a delicious pause in our busy schedules. Even a rainy Tuesday afternoon can feel like a special holiday if you have a cold glass and a can of whipped cream ready to go in your fridge.
This recipe stands out because it focuses on the harmony between the temperature of the glass and the ratio of the ingredients which is often overlooked in basic recipes. By taking the time to understand why we use specific types of milk and how the ice cream should feel before it hits the blades you ensure a superior result. This is not just a drink but a full sensory experience that starts with the sound of the blender and ends with the sight of a perfect white peak of cream dusted with cocoa powder. We live in a fast world where everything is instant but taking ten minutes to craft a handmade shake is a form of self care that honors your taste buds. It is about the thick bubbles that form on top and the way the chocolate syrup creates beautiful patterns against the glass walls before you even pour the mixture. Once you learn this method you will likely find that store bought shakes simply do not compare to the freshness and richness of your own home version. This article is designed to walk you through every single phase so that your very first attempt is a total success that makes you feel like a kitchen hero. Get ready to transform your kitchen into a dessert paradise as we dive into the ingredients and the simple steps needed to reach chocolate perfection.
Ingredients You Will Need
To create this masterpiece you will need to have these items ready on your counter so you can work quickly before things start to melt.
-
Three large scoops of premium vanilla bean or chocolate ice cream
-
One half cup of whole milk or full fat oat milk for extra creaminess
-
Three tablespoons of high quality chocolate syrup or melted dark chocolate
-
One teaspoon of pure vanilla extract to enhance the cocoa notes
-
One cup of heavy whipping cream for the homemade topping
-
One tablespoon of powdered sugar for the cream
-
A pinch of fine sea salt to balance the sweetness
-
Extra chocolate shavings or sprinkles for the final garnish
Step by Step Method
Step One: Chill Your Glassware
Before you even touch the ingredients you should place your tall serving glass in the freezer for about ten minutes. A frosted glass is the best kept secret of professional shops because it keeps the milkshake thick and cold from the first sip to the last drop.
Step Two: Soften the Ice Cream
Take your ice cream out of the freezer and let it sit on the counter for about five minutes. You do not want it to be soup but you also do not want it to be rock hard because that puts a lot of stress on your blender and requires more milk which can thin out the flavor.
Step Three: Prepare the Whipped Cream
In a cold mixing bowl pour your heavy whipping cream and powdered sugar. Use a hand mixer or a whisk to beat the cream until it forms stiff peaks that hold their shape. Set this aside in the fridge so it stays firm while you blend the shake.
Step Four: Combine the Liquids
Pour the half cup of milk and the three tablespoons of chocolate syrup into the blender jar first. Adding the liquid before the solid ice cream helps the blender blades move more freely and prevents those annoying air pockets that stop the mixing process.
Step Five: Add the Ice Cream and Flavorings
Add your three large scoops of ice cream into the blender along with the vanilla extract and that tiny pinch of sea salt. The salt will not make it salty but it will actually make the chocolate taste more like chocolate.
Step Six: The Blending Process
Turn your blender on a low setting at first to break up the large scoops of ice cream. Once things start moving you can switch to a medium speed for about thirty seconds. Do not over blend because the heat from the motor will start to melt the ice cream and turn your shake into thin chocolate milk.
Step Seven: The Pour
Take your frosted glass out of the freezer. If you want to be extra fancy you can drizzle a little bit of chocolate syrup around the inside walls of the glass. Slowly pour the thick milkshake into the glass leaving about an inch of space at the top for your toppings.
Step Eight: Final Assembly
Take your whipped cream out of the fridge and place a massive dollop on top of the shake. You can use a piping bag if you want a perfect swirl or just use a spoon for a rustic look. Top it off with chocolate shavings or sprinkles and serve it immediately with a wide straw.
Why This Recipe Is Special
This recipe is special because it does not use any fillers or artificial thickeners to achieve its body. The richness comes purely from the fat content of the dairy and the quality of the cocoa used in the syrup. While this is a high calorie treat it does provide a good amount of calcium from the milk and ice cream which is essential for bone health. Chocolate also contains flavonoids which are antioxidants that can help with heart health and blood flow when consumed in moderation. The main benefit of this recipe is the psychological boost it provides because taking time to enjoy a treat can reduce cortisol levels and make you feel more relaxed. It is a simple joy that reminds us that food is not just fuel but also a source of pleasure and a way to connect with the people we love. Using real whipped cream instead of the stuff from a can also makes a huge difference in the mouthfeel because it stays cold and creamy without a greasy aftertaste.
Extra Tips for Better Taste
For an even deeper flavor you can try using a mixture of dark chocolate and milk chocolate syrups. If you want a bit of texture you can toss in a handful of crushed chocolate sandwich cookies or a few malted milk balls during the last five seconds of blending. Another great tip is to use coffee instead of milk if you want a mocha version of this shake because the bitterness of the coffee brings out the fruitier notes of the chocolate. Make sure your blender blades are sharp and clean because any old residue can change the flavor profile of your delicate vanilla ice cream. If you are making this for adults you can even add a tiny bit of peppermint extract for a refreshing thin mint style flavor. Always remember to use the best ice cream you can afford because the ice cream is the foundation of the entire drink and low quality brands often have too much air pumped into them.
Final Thoughts
This chocolate milkshake topped with whipped cream is the ultimate way to bring a bit of luxury into your daily life without needing to go to a restaurant. It is a simple and honest recipe that celebrates the classic flavors we all know and love. We hope you enjoy the process of blending and decorating as much as you enjoy the first cold sip. Sharing a milkshake is a beautiful gesture of friendship and love so make sure to double the recipe if you have someone special nearby. Thank you for following along and we hope this becomes your new favorite way to celebrate the sweet side of life.
Nutrition Details
This table provides the estimated nutritional values for one large serving of this homemade chocolate milkshake.
| Ingredient Item | Calories | Fat Content | Carbohydrates | Protein |
| Vanilla Ice Cream | 410 | 22g | 45g | 6g |
| Whole Milk | 75 | 4g | 6g | 4g |
| Chocolate Syrup | 150 | 0g | 36g | 1g |
| Whipped Cream | 100 | 11g | 2g | 1g |
| Total Per Serving | 735 | 37g | 89g | 12g |
Disclaimer
Please keep in mind that every individual has a unique body and different dietary requirements. This recipe is a high sugar and high fat treat and the nutritional results may vary based on the specific brands of ingredients you use. If you have underlying health conditions like diabetes or lactose intolerance you should consult with a medical professional before enjoying this drink. This content is for informational and entertainment purposes and does not constitute professional health or medical advice.