 Skip to content
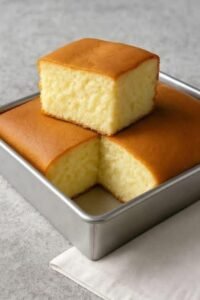
If you are looking for a classic baking recipe that delivers a perfectly light, fluffy, and golden result, you have come to the right place today. As you can see in the beautiful square pieces shown in image_d125dc.jpg, a traditional sponge cake is all about achieving an incredibly airy and uniform crumb structure that melts in your mouth with every single bite. This specific recipe focuses on the timeless method of whipping fresh eggs with sugar to trap millions of tiny air bubbles, which allows the batter to rise naturally into a cloud like texture without relying heavily on artificial leavening agents. It transforms basic, everyday kitchen staples into a magnificent, pillowy masterpiece that serves as the perfect foundation for elaborate birthday layers or remains wonderfully elegant when served completely on its own.
People all over the world are absolutely falling in love with this homemade dessert because it delivers a level of soft comfort and clean flavor that store bought alternatives simply cannot match. Unlike heavy butter cakes or dense pound cakes that can sometimes leave you feeling overly full, the unique texture of this creation is remarkably delicate, bouncy, and airy. Its subtle sweetness is perfectly balanced, making it a wonderful canvas that pairs beautifully with fresh berries, tart lemon curd, rich chocolate ganache, or a simple cloud of whipped cream. It is a fantastic way to master the core fundamentals of traditional baking, giving you a reliable recipe that makes your kitchen smell like a professional pastry shop while using very simple tools.
You should definitely make this wonderful recipe whenever you want to celebrate a family milestone, host an elegant afternoon tea party, or surprise your loved ones with a comforting afternoon treat. On rainy days when you want your home to feel warm and inviting, the process of sifting flour and beating eggs brings an instant wave of mindfulness and emotional comfort to your routine. While it is certainly a delightful indulgence, you can easily enjoy a modest slice alongside a cup of green tea as a satisfying reward after a challenging fitness workout because it contains significantly less fat than heavy pastries. Whatever your personal motivation might be, bringing this beautifully baked golden treat out of your oven will spread happiness across your dinner table and build lasting memories with the people you care about most.
Ingredients You Will Need
To create this delightfully fluffy and tall cake, you will need to gather a few simple ingredients from your local grocery store or pantry. The exact amounts and units are carefully listed below to ensure your batter reaches the ideal consistency every single time you bake.
-
Large fresh eggs at room temperature: 4 pieces
-
Granulated white sugar: 150 grams
-
All purpose flour or premium cake flour: 150 grams
-
Unsalted butter melted and cooled slightly: 30 milliliters
-
Pure vanilla extract for a rich sweet aroma: 5 milliliters
-
Whole milk at room temperature: 15 milliliters
-
Fine sea salt: 1 pinch
Step by Step Method
Creating this recipe is very easy and takes less than one hour from start to finish if you follow these detailed instructions closely. Even if you are a complete beginner who has never turned on an oven before, you can achieve a flawless rise and a beautiful texture on your very first try.
First, you need to prepare your baking environment by preheating your kitchen oven to one hundred seventy degrees Celsius. Take a square baking pan similar to the one shown in image_d125dc.jpg, rub a small drop of oil or butter across the inside surfaces, and line the bottom with a clean sheet of parchment paper so the baked product releases easily later without tearing.
Next, separate your dry ingredients from your wet ones to ensure a smooth workflow. Take your one hundred fifty grams of flour and pass it through a fine mesh sifter into a medium bowl at least two times. Sifting the flour is an essential step because it breaks up any dense clumps and incorporates extra air, which helps the final product stay incredibly light and fluffy.
Now, place the four large room temperature eggs and the one hundred fifty grams of granulated white sugar into a large, clean mixing bowl. Use an electric hand mixer or a stand mixer equipped with a large wire whisk attachment to beat the eggs and sugar together on a high speed setting. Continue whipping this mixture continuously for about eight to ten full minutes without stopping.
As the minutes pass, you will notice the egg mixture changing from a bright yellow liquid into a thick, pale cream color that expands significantly in volume. Keep whipping until the mixture reaches what bakers call the ribbon stage, meaning when you lift the whisk out of the bowl, the batter falls back down in a thick stream that leaves a visible trail on the surface for a few seconds before disappearing.
Once your eggs are perfectly whipped, add the five milliliters of pure vanilla extract and the single pinch of fine sea salt into the bowl. Turn your electric mixer down to its lowest speed setting for just five seconds to distribute the flavor evenly without popping any of the precious air bubbles you just created.
Next, remove the electric mixer completely and grab a silicone rubber spatula. Add the sifted flour into the egg mixture in three separate batches rather than dumping it all at once. Use a gentle folding motion with your spatula, moving in a circle from the bottom of the bowl up to the top, carefully turning the batter over itself until the flour disappears into the cream.
In a small separate cup, combine the thirty milliliters of melted unsalted butter and fifteen milliliters of whole milk. Take a single large spoonful of your main cake batter and stir it directly into the butter and milk mixture until it is smooth, then pour this combined liquid back into the main mixing bowl and fold it gently with your spatula two or three more times.
Carefully pour the smooth, pale batter into your prepared square baking pan, using your spatula to level the top surface gently. Place the pan onto the middle rack of your preheated oven and bake undisturbed for twenty five to thirty minutes. Avoid opening the oven door during the first twenty minutes because a sudden rush of cool air can cause the delicate center to deflate.
The cake is fully baked when the top surface turns a beautiful golden brown color and the edges begin to pull away slightly from the sides of the metal pan. You can also insert a clean wooden toothpick directly into the very center of the cake, and if it comes out completely dry with no wet batter attached, your dessert is ready. Remove the pan from the oven, let it cool completely on a wire rack for twenty minutes, and then cut it into beautiful square portions just like the presentation shown in image_d125dc.jpg.
Why This Recipe Is Special
This recipe stands out from modern quick cakes because it celebrates the beautiful purity of traditional baking techniques where simple physics creates an incredible texture. By utilizing the natural lifting power of whipped eggs, you create a sponge that is entirely free from chemical baking powders or artificial stabilizers, resulting in a remarkably clean and honest flavor profile.
From a health standpoint, this dessert is a wonderful alternative for individuals who want to enjoy a sweet treat without consuming massive quantities of heavy lipids. Because it relies primarily on eggs and flour with only a minimal amount of added butter, it contains a fraction of the saturated fats found in traditional frostings, oil based cakes, or processed supermarket snacks.
Another reason this recipe is so special is its exceptional structural durability and liquid absorption properties. The open, bouncy crumb acts exactly like a natural sponge, allowing it to soak up flavored sugar syrups, fruit juices, or liqueurs without becoming mushy or collapsing under the weight of heavy cream toppings, making it an indispensable tool for any creative home cook.
Extra Tips for Better Taste
If you want to take your dessert experience to an even higher level of gourmet excellence, you can try a few creative adjustments to suit your personal palate. The temperature of your eggs plays a monumental role in the success of this recipe, so always ensure they sit on your counter for at least one hour before baking because warm egg whites can trap double the amount of air compared to cold eggs straight from the refrigerator.
You can also experiment with infusing different natural aromatics into your milk and butter mixture before folding it into the main batter. Heating the milk gently with a handful of fresh lemon zest, orange peel, or a crushed sprig of fresh rosemary allows the essential oils to release into the liquid, providing a beautiful background flavor that surprises your guests.
For an incredibly moist experience that keeps the cake fresh for several days, you can prepare a simple sugar syrup by boiling equal parts of water and sugar together with a splash of fresh lemon juice. Use a pastry brush to apply this warm syrup generously over the surfaces of the cake slices right after cutting them, which locks in the internal moisture and adds a delightful gloss.
If you prefer a rich and nutty flavor profile, you can replace twenty grams of the all purpose flour with an equal amount of finely ground almond flour or toasted hazelnut flour. This subtle substitution introduces a wonderful depth of flavor and a slightly rustic texture that pairs beautifully with a hot cup of black coffee or dark espresso.
For those who love a visually striking presentation, you can dust a fine layer of powdered confectioners sugar through a small strainer directly over the top of the golden crust right before serving. You can also place a few fresh mint leaves and whole red raspberries on top of each square slice to create a beautiful color contrast that looks incredibly professional.
Final Thoughts
Baking from scratch should always feel like an uplifting and rewarding journey, and this classic sponge cake proves that you do not need complicated equipment or expensive gourmet ingredients to create something truly extraordinary. It is a simple, elegant, and highly dependable recipe that forms the absolute backbone of traditional pastry arts, making it a vital skill for beginners and veteran home bakers alike. Do not feel discouraged if your first attempt does not rise perfectly, as mastering the gentle folding motion takes a little bit of practice and patience. Gather your fresh eggs, sift your flour with care, and enjoy the beautiful process of baking a golden cloud of happiness in your kitchen today.
Nutrition Details
Here is a clear breakdown of the estimated nutritional content for this classic recipe. The numbers represent the values for one individual square portion when the entire cake is cut into nine equal pieces as displayed in image_d125dc.jpg.
| Nutrient Type | Amount Per Serving | Percentage of Daily Value |
| Total Calories | 175 calories | 9 percent |
| Protein Content | 4 grams | 8 percent |
| Total Carbohydrates | 30 grams | 10 percent |
| Dietary Fiber | 0.5 grams | 2 percent |
| Total Fat | 4.5 grams | 6 percent |
| Sugars | 17 grams | 17 percent |
| Cholesterol | 85 milligrams | 28 percent |
| Calcium | 25 milligrams | 2 percent |
Disclaimer
Please remember that every human body is completely unique and personal health results may change depending on your individual metabolism, daily physical activity, and overall nutritional habits. The health and nutritional data provided in this guide is an estimate calculated using standard ingredient databases and could vary slightly depending on the specific size of the eggs or the brand of flour you choose at your local market. It is always a wise idea to consult with a qualified primary care physician or a registered dietitian before making significant modifications to your daily eating pattern or lifestyle routine.
The Structural Science of Egg Whites
To truly understand how a sponge cake functions without baking powder, it helps to look at the fascinating molecular science behind your ingredients. Egg whites are comprised of roughly ninety percent water and ten percent pure protein strings shaped like tightly coiled springs. When you begin beating the eggs with your electric mixer, the physical force stretches these protein strings out of their original shapes and forces air directly into the liquid matrix.
As the whipping continues, the stretched proteins form a protective net that traps the air bubbles, while the addition of granulated sugar strengthens this net by binding with the water molecules and preventing the structure from collapsing. When the pan enters the hot oven, the trapped air expands rapidly due to the heat, causing the batter to rise high into the air. Eventually, the heat cooks the egg proteins and sets the flour starches, turning the delicate foam into a permanent, solid structure that retains its shape after cooling.
Choosing the Ideal Pan for Uniform Baking
The material and shape of the pan you select will have a direct impact on how evenly your cake bakes from the outer edges to the very center. Metal baking pans, such as the aluminum square pan pictured in image_d125dc.jpg, are highly recommended by professional pastry chefs because metal conducts heat incredibly fast and distributes it uniformly across the food surface. This quick heat transfer allows the cake edges to set at a similar rate to the center, creating a beautifully flat and even top.
Glass or heavy ceramic baking dishes, on the other hand, absorb heat much more slowly and retain it for a longer period of time, which can cause the outer edges of your cake to overcook and turn dark brown before the center has a chance to bake completely through. If you only have a glass dish available in your kitchen, you can compensate for this by lowering your oven temperature by ten degrees Celsius and extending the total baking time by five to ten minutes.
Mastering the Art of the Gentle Fold
The single moment where most beginners make a mistake is during the process of incorporating the dry flour into the whipped egg cream. If you mix the ingredients aggressively with a spoon or continue using an electric mixer at this stage, the heavy friction will pop the delicate air bubbles, causing your batter to lose its volume and turn back into a dense liquid that bakes into a hard, rubbery pancake.
To prevent this tragedy, always utilize a wide silicone spatula and practice a patient folding motion. Slice your spatula straight down through the center of the bowl, sweep it along the curved bottom toward the outer edge, and lift the batter up and over itself while rotating the bowl slightly with your other hand. This motion incorporates the flour smoothly through gentle distribution rather than forceful agitation, preserving the wonderful airy structure that makes the final cake so light.
Adapting This Recipe for Festive Celebrations
Once you are fully comfortable baking the basic square slices shown in image_d125dc.jpg, you can easily adapt this versatile recipe to create spectacular showpieces for major holidays and festive events. For a classic European strawberry shortcake, you can bake the batter in a round springform pan, slice the cooled cake horizontally into two even discs, and fill the middle layer with a generous amount of sweetened whipped cream and sliced fresh strawberries.
If you are celebrating a autumn harvest festival or a winter holiday, you can replace the vanilla extract with a blend of ground cinnamon, grated nutmeg, and ground ginger, while substituting the regular white sugar with dark brown sugar. This simple alteration transforms the pale yellow dessert into a deeply aromatic spice cake that fills your entire home with a cozy, festive fragrance that pairs beautifully with warm apple cider.
How to Prevent Your Cake from Shrinking
It can be quite frustrating to watch your beautiful cake rise magnificently inside the hot oven, only to see it sink drastically in the center or wrinkle along the sides as soon as you pull it out into the cool kitchen air. This shrinking phenomenon occurs when the internal steam cools down too quickly before the flour structure has fully set and hardened to support its own weight.
To minimize this risk, ensure your oven is fully calibrated and running at the correct temperature using an independent oven thermometer. Additionally, once the baking time is complete, you can turn off the oven completely, crack the door open by just five centimeters, and allow the cake pan to sit inside the cooling oven for five extra minutes. This gentle, gradual temperature transition allows the delicate starches to stabilize safely before meeting the cooler air of your kitchen counter.
Storing Your Sponge Cake to Retain Freshness
Because a traditional sponge cake contains very little fat or oil, it can dry out much faster than a standard butter cake if left exposed to the open air of your kitchen. If you do not plan to consume the entire dessert on the day it is baked, storing the remaining pieces correctly is essential for maintaining that wonderful, moist texture displayed in image_d125dc.jpg.
As soon as the cake cools down completely to room temperature, wrap it tightly in two layers of plastic wrap or place the individual square pieces inside an airtight plastic container. You can store the container on your kitchen counter at room temperature for up to two days, or place it inside your refrigerator for up to five days if you live in a highly humid climate. If you want to store it for a future event, you can wrap the cake securely in aluminum foil and freeze it for up to two months, allowing it to thaw slowly on your counter before serving.