 Skip to content
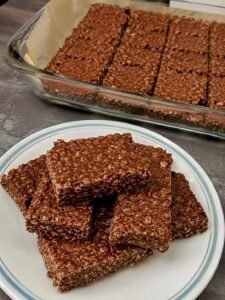
The homemade chocolate crunch bar is a fantastic and simple dessert that brings together the rich taste of cocoa and the satisfying snap of crispy cereal. This recipe is all about creating a nostalgic snack that reminds many people of the famous candy bars they enjoyed as children but with the added benefit of being made fresh in your own kitchen. It is a wonderful combination of melted chocolate and a light crunchy base that creates a texture that is both smooth and crispy in every single mouthful. Unlike complicated baked goods that require a lot of time and precision this treat is a no bake masterpiece that relies on the simple magic of melting and cooling. You will find that making these bars is an incredibly rewarding experience because it allows you to control the quality of the chocolate and the type of crunch you want to include. It is a perfect project for a beginner cook because it is almost impossible to get wrong and the results always look like they came from a professional confectionery shop.
People absolutely love this recipe because it strikes a perfect balance between being a simple snack and a decadent treat that feels very special. There is a deep and satisfying comfort that comes from the sound of a chocolate bar cracking as you take a bite followed by the airy crunch of the toasted rice inside. Because you are making these at home you can skip all the artificial waxes and strange preservatives that are often found in store bought candy bars which makes the flavor much more pure and intense. Many fans of this recipe enjoy how easy it is to share with friends and family because the bars are sturdy and can be cut into any size you like for a party or a gift. It is a crowd pleasing favorite that brings a sense of fun and excitement to the table whenever a plate of these dark and shiny bars is served. The simplicity of the ingredients means that the natural aroma of the chocolate is the star of the show making your entire kitchen smell like a cozy chocolate factory while you work.
You should consider making these chocolate crunch bars whenever you want a quick emotional boost or a sweet reward that does not require you to turn on the oven. They are the perfect choice for a movie night at home with your favorite people or as a surprise treat for a child who has worked hard at school. From a fitness perspective these bars can be a great way to enjoy a controlled portion of dark chocolate which is known to have antioxidants that help support a healthy mood and heart. Making your own snacks is a powerful act of self care because it gives you total power over what goes into your body while still allowing you to enjoy the sweeter things in life. You might also choose to make these for a holiday celebration or a neighborhood potluck because they are very easy to transport and everyone loves a good chocolate snack. Whether you are looking for a way to use up some extra cereal in your pantry or you want to create a high quality dessert that will impress your guests these crunch bars are a versatile and reliable option that always brings a lot of happiness.
Ingredients You Will Need
To create these crunchy and delicious chocolate bars you will need to gather a few simple ingredients that are easy to find at any grocery store.
-
Two cups of high quality dark chocolate or milk chocolate chips
-
Two cups of crispy puffed rice cereal or toasted rice cereal
-
One tablespoon of coconut oil to make the chocolate smooth and shiny
-
Half a cup of creamy peanut butter or almond butter for a richer base
-
One teaspoon of pure vanilla extract
-
A small pinch of flaky sea salt for the perfect salty and sweet balance
Step by Step Method
Making these chocolate crunch bars is a very easy process that involves melting the base and stirring in the crunch before letting it set in the refrigerator.
First you need to prepare your baking pan so that the bars are easy to remove once they are cold. Take an eight inch square baking pan and line it with a piece of parchment paper. Make sure the paper hangs over the edges of the pan a little bit so that you can lift the entire block of chocolate out later without it sticking to the sides. If you do not have parchment paper you can lightly grease the pan with a tiny bit of coconut oil instead.
Next it is time to melt the chocolate and the creamy base together. Place your two cups of chocolate chips and the half cup of nut butter and the tablespoon of coconut oil into a large glass bowl. You can melt this mixture using a double boiler on the stove or by using the microwave in short bursts of thirty seconds. If you use the microwave make sure to stir the mixture very well after each burst because chocolate can burn very quickly if it stays in one spot for too long. Keep going until the chocolate is completely liquid and looks smooth and glossy.
Once the chocolate mixture is fully melted and smooth remove it from the heat and stir in the vanilla extract and the tiny pinch of salt. The vanilla adds a wonderful warmth to the cocoa and the salt helps to bring out the hidden sweetness of the chocolate. Make sure everything is well combined so that the flavor is even throughout the whole batch of bars.
Now you will add the most important part which is the crunch. Pour the two cups of crispy rice cereal into the bowl of melted chocolate. Use a large spoon or a spatula to fold the cereal into the chocolate gently. You want to make sure every single piece of puffed rice is completely coated in the dark liquid so that there are no dry spots. Be careful not to crush the cereal too much because you want those big airy bubbles to provide a great texture in every bite.
Pour the finished mixture into your prepared baking pan. Use the back of a spoon to spread the chocolate out into an even layer so that it reaches all four corners of the pan. You can tap the pan gently on the counter to help the chocolate settle and to remove any tiny air bubbles that might be trapped at the bottom. If you want a really beautiful finish you can sprinkle a few extra pieces of cereal or a little bit more flaky sea salt over the top while the chocolate is still wet.
Place the pan into the refrigerator and let it sit for at least two hours. This chilling time is very important because it allows the chocolate to harden and the coconut oil to set which gives the bars their firm and snappy texture. If you are in a very big hurry you can put the pan in the freezer for about thirty minutes but the refrigerator is better for a smoother finish.
When the chocolate is completely firm to the touch lift it out of the pan using the edges of the parchment paper. Place the block of chocolate on a sturdy cutting board. Use a large sharp knife to cut the block into rectangular bars or small squares. To get very clean cuts you can dip your knife in warm water and wipe it dry before each slice. Store your finished chocolate crunch bars in an airtight container in the fridge to keep them from melting or getting soft.
Why This Recipe Is Special
This recipe is special because it allows you to enjoy a classic candy bar experience using only a few natural and high quality ingredients. By making these bars yourself you avoid the corn syrups and artificial flavors that are usually found in commercial chocolate snacks. The addition of nut butter not only adds a delicious creamy taste but also provides a little bit of protein and healthy fats which makes the snack more satisfying for your body.
The taste is a wonderful mix of deep chocolate and nutty undertones with a light and airy crunch that never feels too heavy. It is special because it is a very fast recipe that delivers a lot of value for very little work which is great for busy people who still love to cook. This dish celebrates the simple joy of high quality ingredients being brought together in a way that is fun to make and even more fun to eat with the people you love.
Extra Tips for Better Taste
If you want to take your chocolate crunch bars to the next level there are many creative ways to experiment with the recipe. You can try adding a handful of crushed pretzels or some toasted sunflower seeds to the mix for a different kind of salty crunch. Some people love to add a little bit of shredded coconut or some dried cranberries to the batter to give it a more complex flavor and a chewy texture that contrasts with the crispy cereal.
Another great tip is to use a mixture of dark chocolate and white chocolate to create a beautiful marbled effect on the top of your bars. You can also try using different kinds of puffed grains like puffed quinoa or puffed amaranth if you want to increase the nutritional value of your snack. To ensure the absolute best results always use the highest quality chocolate you can afford because the flavor of the cocoa is the most important part of the entire dish. If you find the bars are too hard to bite into directly from the fridge let them sit on the counter for five minutes before eating so they soften just a tiny bit.
Final Thoughts
Making your own chocolate crunch bars is a joyful way to bring a little bit of sweetness into your day. We hope that this simple guide helps you create a snack that is perfectly crispy and wonderfully rich every single time you head into the kitchen. There is a special kind of pride that comes from eating a treat that you made with your own hands and we are sure that your family and friends will be very impressed with your skills. Remember that cooking is a journey of discovery and a way to share love with others through the food you create. Happy melting and we hope you enjoy every crunchy and chocolatey bite of your new favorite homemade candy.
Nutrition Details
This table shows the approximate nutrition for one chocolate crunch bar assuming you cut the pan into sixteen equal pieces.
Disclaimer
Please be aware that everyone has a unique body and different nutritional requirements so the way your body responds to this treat may vary from person to person. This recipe is meant for general enjoyment and should not be taken as professional medical or dietary advice. If you have a nut allergy or a sensitivity to dairy please be very careful and use alternative ingredients that are safe for your specific health needs. The calorie counts provided are estimates based on standard ingredients and may change depending on the brands and quantities you choose to use in your own kitchen. Always monitor your intake of sugar and fats to maintain a balanced and healthy diet.
Would you like me to create an image of these crispy and shiny chocolate bars for your article?