 Skip to content
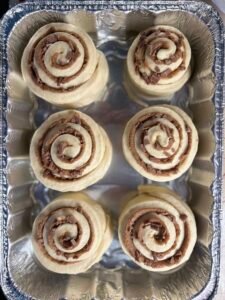
The smell of fresh cinnamon rolls baking in the oven is one of the most wonderful things you can experience in your own kitchen. This recipe is all about creating that perfect moment where your whole house feels warm and full of love because of a simple tray of dough and spice. When you follow these steps you are not just making a snack but you are making a memory that your family will cherish for a very long time. Many people feel scared of using yeast or making dough from scratch because it seems like a very hard task for a beginner. However this guide is designed to show you that anyone can master the art of baking soft and gooey rolls if they have the right instructions and a bit of patience. We will focus on the soft texture of the bread and the rich sweetness of the cinnamon filling that makes every bite feel like a hug for your soul. By the time you finish reading this you will feel confident enough to start your own baking journey and create a treat that looks like it came from a professional bakery.
People all over the world love cinnamon rolls because they offer a perfect balance of different textures and flavors in one single bite. You get the slight crunch on the outside of the roll while the inside remains incredibly soft and pillowy like a cloud of sugar. The spicy kick of the cinnamon works perfectly with the deep sweetness of the brown sugar to create a filling that melts into the dough as it bakes. Then you have the creamy frosting on top which adds a cool and tangy layer that cuts through the richness of the butter and bread. It is a classic comfort food that appeals to everyone from young children who love the sugar to adults who appreciate the complex aroma of the spices. There is something very satisfying about pulling a warm roll apart with your fingers and seeing the layers of dough spiraling around the dark cinnamon center. This recipe has survived through many generations because it hits all the right spots for anyone who enjoys a sweet and hearty treat that feels substantial and satisfying.
You might wonder when is the best time to make these delicious treats or why you should put in the effort to bake them yourself. One of the best reasons to make cinnamon rolls is the emotional connection they build during special mornings like birthdays or holiday celebrations. There is no better way to wake up your loved ones than with the scent of cinnamon floating through the hallways of your home. Beyond the emotional side these rolls are also a great way to control exactly what goes into your food compared to buying processed snacks from a store. When you bake at home you can choose high quality butter and fresh flour which makes the final product taste much better and feel much fresher. Some people also find the process of kneading the dough to be very relaxing and a great way to relieve stress after a long and busy week. Even if you are watching your fitness you can enjoy one of these as a special reward for your hard work because homemade treats contain no hidden chemicals or preservatives.
Baking is a journey that teaches you how to be mindful and present in the moment as you watch the dough slowly rise and change shape. This recipe is special because it does not require any fancy equipment or expensive tools that you might find in a professional kitchen. All you really need is your hands and a bowl and a warm place for your dough to sit while it grows. Many beginners find that once they successfully bake their first batch of cinnamon rolls they feel a huge boost in their confidence and want to try more complex recipes. It is a wonderful hobby that allows you to share your creations with friends and neighbors which is a great way to spread happiness in your community. Whether you are making these for a rainy afternoon snack or a big family breakfast you will find that the process is just as rewarding as the actual eating. Let us look at what you will need to get started on this delicious adventure so you can start smelling that cinnamon magic in your own home very soon.
-
Ingredients You Will Need
To make the dough you will need these items:
-
Two and one fourth teaspoons of active dry yeast
-
One cup of warm whole milk
-
One half cup of granulated white sugar
-
One third cup of melted unsalted butter
-
One teaspoon of fine salt
-
Two large eggs at room temperature
-
Four and one half cups of all purpose flour
To make the filling you will need these items:
-
One cup of packed brown sugar
-
Two and one half tablespoons of ground cinnamon
-
One third cup of softened unsalted butter
To make the cream cheese frosting you will need these items:
-
Four ounces of softened cream cheese
-
One fourth cup of softened unsalted butter
-
One and one half cups of powdered sugar
-
One half teaspoon of pure vanilla extract
-
One eighth teaspoon of salt
Step by Step Method
The first thing you must do is prepare your yeast so that your dough will rise properly and become very fluffy. Take your warm milk and pour it into a large mixing bowl but make sure the milk is not too hot because high heat will kill the yeast. A good rule is that the milk should feel like warm bath water when you touch it with your finger. Sprinkle the yeast over the warm milk and add a pinch of the sugar then let it sit for about five to ten minutes. You will know the yeast is ready when you see little bubbles forming on the surface and it starts to smell like fresh bread. This process is called blooming the yeast and it is the most important part of ensuring your rolls do not end up hard or flat.
Once your yeast is bubbly you can add the rest of the sugar and the melted butter and the salt and the eggs into the bowl. Whisk these ingredients together until the eggs are fully broken and everything looks like a smooth yellow liquid. Now you can start adding the flour one cup at a time while you stir with a large wooden spoon or a spatula. Keep adding flour until the dough starts to pull away from the sides of the bowl and becomes a bit sticky but manageable. You might not need all four and one half cups of flour so stop adding it if the dough feels firm enough to touch without sticking to your skin too much.
Now it is time to knead the dough which is how you develop the structure that makes the rolls chewy and strong. Turn the dough out onto a flat surface that has a light dusting of flour on it so it does not stick. Use the palms of your hands to push the dough away from you and then fold it back over itself and turn it slightly. Repeat this motion for about five to seven minutes until the dough feels very smooth and bounces back when you poke it with your finger. If the dough is too sticky you can add a tiny bit more flour but be careful not to add too much or the rolls will be dry. Place the smooth ball of dough into a greased bowl and cover it with a warm damp cloth or some plastic wrap.
Put the bowl in a warm spot in your kitchen where there are no cold breezes and let it sit for about one hour. During this time the yeast will eat the sugar and release air which makes the dough double in size. While the dough is rising you can prepare your filling by mixing the brown sugar and the ground cinnamon in a small bowl until they are well combined. You should also make sure your butter for the filling is very soft so that it spreads easily across the dough later. Check on your dough after sixty minutes and if it has grown to twice its original size you are ready for the next exciting step.
Gently punch the dough down to let out the extra air and then place it back on your floured surface. Use a rolling pin to stretch the dough into a large rectangle shape that is about twelve inches wide and eighteen inches long. Try to make the thickness of the dough even all the way across so that every roll bakes at the same speed. Once you have a nice rectangle spread your softened butter all over the surface but leave a tiny bit of space at the very edges. Sprinkle your cinnamon and sugar mixture evenly over the butter so that every inch of the dough is covered in that sweet brown coating.
Start at one of the long edges and begin to roll the dough up tightly into a long log shape. You want the roll to be firm so that the layers stay together but do not pull so hard that you tear the soft dough. When you reach the end pinch the seam of the dough against the log to seal it shut so the filling does not leak out. Now use a sharp knife or a piece of unflavored dental floss to cut the log into twelve even pieces. Using dental floss is a great trick because it cuts through the dough without squashing the beautiful round shape of the rolls.
Place the rolls into a greased baking pan that is about nine by thirteen inches in size and leave a little bit of space between them. Cover the pan again and let the rolls rise for another thirty to forty-five minutes so they can get even bigger and touch each other. While they are rising for the second time you should turn your oven on and set it to three hundred and fifty degrees Fahrenheit. When the rolls look puffy and have filled up the pan you can put them in the center of the oven to bake. Let them cook for about twenty to twenty-five minutes until the tops are a light golden brown color.
While the rolls are baking you can quickly mix up your frosting by beating the cream cheese and butter together until they are smooth. Add the powdered sugar and vanilla and salt then keep mixing until the frosting is creamy and has no lumps. When the rolls come out of the oven let them cool for just five minutes before you spread the frosting over them. Spreading the frosting while the rolls are still warm allows some of it to melt down into the spirals which makes them extra gooey. Now your homemade cinnamon rolls are finished and ready for you to enjoy while they are still warm and fresh.
Why This Recipe Is Special
This recipe is special because it focuses on the classic techniques that make a truly great cinnamon roll without using any shortcuts that ruin the flavor. By making the dough from scratch you are ensuring that the bread has a rich and buttery taste that you simply cannot get from a store bought can. The use of whole milk and real eggs provides a level of moisture and fat that keeps the rolls soft for days instead of them turning hard right after they cool down. You are also in control of the spice level which means you can use the best quality cinnamon available to get that deep and warming aroma. This recipe is also very forgiving for people who are just starting out because the dough is easy to handle and does not require a machine.
From a health perspective making these at home is much better because you know there are no artificial dyes or high fructose corn syrup involved. You are using real sugar and real butter which the body can process more naturally than the chemical alternatives found in mass produced snacks. Even though this is a sweet treat it provides a sense of satisfaction that prevents you from overeating because the ingredients are so rich and filling. Sharing a batch of these with others also promotes social health and builds stronger bonds with your friends and family members. There is a special kind of pride that comes from serving something you made with your own two hands which is a great boost for your mental well being. The taste is also far superior because the layers of dough and cinnamon are perfectly balanced with the creamy frosting on top.
Extra Tips for Better Taste
If you want to take your cinnamon rolls to the next level you can try a few simple tricks that professional bakers use. One great tip is to use bread flour instead of all purpose flour if you want a roll that is a bit more chewy and holds its shape better. Another secret is to pour a little bit of heavy cream over the rolls right before you put them in the oven to bake. The cream soaks into the dough and makes the bottom of the rolls incredibly soft and almost like a caramel pudding. You can also experiment with the filling by adding some chopped pecans or walnuts if you like a bit of a crunchy texture in your rolls.
For the best flavor always use fresh spices because cinnamon can lose its strength if it has been sitting in your cupboard for too long. You can also add a tiny bit of orange zest to the frosting to give it a bright and citrusy kick that balances the heavy sugar. If you find that your rolls are browning too fast in the oven you can cover the pan with a piece of aluminum foil for the last ten minutes of baking. Make sure your cream cheese and butter are truly at room temperature before you make the frosting so that it turns out perfectly smooth. Lastly always store any leftovers in an airtight container so they stay soft and you can reheat them in the microwave for a few seconds to make them taste fresh again.
Final Thoughts
Making cinnamon rolls is a journey that starts with a few simple ingredients and ends with a tray of golden and sweet perfection. It is a process that requires you to slow down and enjoy the art of baking which is a rare treat in our very busy world today. I hope this recipe brings a lot of joy to your kitchen and that you feel proud of the beautiful rolls you have created. Remember that every baker started as a beginner and each time you bake you will get even better at handling the dough and perfect your timing. Please share these with the people you love because food always tastes better when it is enjoyed in good company. Happy baking and enjoy every single gooey and cinnamon filled bite of your hard work.
Nutrition Details
Below is a table that shows the estimated nutrition for one single cinnamon roll based on this recipe. Please remember that these numbers can change depending on the exact brands of ingredients that you choose to use in your kitchen.
One serving is equal to one large cinnamon roll and this recipe makes twelve rolls in total. These rolls are high in energy because of the carbohydrates and fats which makes them a great treat for a special occasion. If you want to reduce the calories you can use a bit less frosting or spread the filling a little thinner across the dough. However the full experience of the recipe comes from following the measurements as they are written to get that classic bakery style taste. Baking at home allows you to be aware of these numbers while still enjoying a high quality dessert that is free from the extra chemicals found in factory food.
Disclaimer
This recipe is provided for informational purposes only and the results may vary from person to person depending on your equipment and environment. Everyone has a different body and different health needs so you should always be mindful of how certain ingredients affect you personally. The nutrition facts provided are estimates and should not be used as medical advice for managing any health conditions. If you have specific dietary restrictions or allergies please make sure to check the labels on your ingredients carefully before you start baking. Always practice safety in the kitchen when using the oven or sharp tools to prevent any accidents or injuries. Cooking and baking are fun activities but they require your full attention to ensure that everything is handled in a safe and healthy way for everyone involved.