 Skip to content
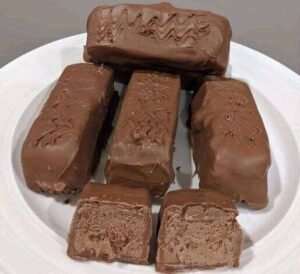
Making your own candy at home is one of the most rewarding things you can do in your kitchen because it feels like magic when a few simple items turn into a famous treat. This recipe is all about creating a homemade version of the classic musketeer candy bar which is famous for its light and fluffy center and its smooth chocolate coating. Many people grew up loving these bars because they are not as heavy as other candies that are filled with nuts or caramel. When you make them at home you get to control every single thing that goes into the pot which means you can use high quality chocolate and fresh ingredients without any strange chemicals or preservatives. This specific guide is designed to help you reach that perfect airy texture that melts in your mouth just like the original version from the store. You will learn how to whip up a beautiful nougat that is sweet and soft while also being firm enough to hold its shape once you dip it into melted chocolate. Even if you have never made candy before you will find that this process is actually quite fun and very satisfying to finish.
The reason why people love this candy so much is because of the unique texture which is often described as eating a sweet cloud covered in chocolate. Most chocolate bars are very crunchy or very chewy but the musketeer style bar is famous for being gentle on the teeth and having a very deep cocoa flavor. Kids love it because it is easy to eat and adults love it because it brings back many happy memories from their childhood summers or trick or treating nights. When you share these homemade bars with your friends they will be shocked that you made them yourself because they look and taste so professional. There is a special kind of joy that comes from seeing the fluffy white center hidden inside a crisp chocolate shell. It is the kind of treat that works for almost any occasion whether you are hosting a big birthday party or just want a little something sweet to keep in your fridge for late night snacking. Plus you can customize the size of the bars to make them tiny bite sized pieces or giant bars for a special gift.
You should make this recipe whenever you feel like being creative or when you want to show someone you care with a handmade gift that tastes amazing. It is a great project for a rainy afternoon when you want your house to smell like a professional chocolate shop and sweet sugar. From an emotional side making candy is very relaxing because it requires you to focus on the textures and the smells of the melting chocolate and the whipped marshmallow cream. If you are someone who watches what they eat you might like this recipe because you can use dark chocolate or organic honey to make a slightly better version of the classic bar. While it is still a dessert you have the power to reduce the sugar or use dairy free options if your body feels better that way. There is no better feeling than pulling a tray of these bars out of the cooling rack and knowing exactly what is inside each one. It is a great way to bond with family members or children because they can help with the dipping process which is always the most exciting part of the whole afternoon.
Taste is the biggest reason why people keep coming back to this homemade musketeer recipe because the flavors are much more vibrant than anything you can buy in a plastic wrapper. The chocolate is richer and the center is much creamier because it has not been sitting on a shelf for months at a time. This recipe is also very helpful for people who have allergies since you can ensure there are no traces of peanuts or tree nuts in your own kitchen. Making candy at home also teaches you a lot about science and how heat changes the way sugar behaves which is a cool skill to have. You can serve these at a holiday party or put them in a pretty box for a teacher or a neighbor as a thank you gift. They are also perfect for movie nights because you can pre cut them into small squares that are easy to pop into your mouth while you watch your favorite film. No matter why you choose to make them the result is always a delicious and impressive snack that will make everyone smile and ask for your secret recipe.
Ingredients You Will Need
To make these delicious treats you will need to gather a few simple things from your pantry and the grocery store. Please make sure you have everything ready before you start because candy making moves fast once the sugar gets hot.
-
2 cups of granulated white sugar
-
1 cup of light corn syrup or honey
-
Half a cup of cold water
-
2 large egg whites at room temperature
-
1 teaspoon of pure vanilla extract
-
A pinch of fine sea salt
-
3 cups of milk chocolate chips for the coating
-
2 tablespoons of vegetable shortening or coconut oil
-
Optional 2 tablespoons of cocoa powder for the filling
Step by Step Method
The first thing you need to do is prepare your baking pan by lining it with parchment paper and leaving some extra paper hanging over the sides so you can lift the candy out later. Take a small bowl and beat your two egg whites until they form very stiff peaks which means they should look like thick white foam that stays in place. Set the egg whites aside for a moment while you work on the sugar syrup. In a medium pot combine your white sugar with the corn syrup and the water and stir it over medium heat until the sugar has completely dissolved into a clear liquid. Stop stirring once it starts to boil and let it cook until it reaches 240 degrees on a candy thermometer which is known as the soft ball stage.
Once the sugar reaches the right temperature you need to very slowly pour the hot syrup into the bowl with the stiff egg whites while your mixer is running on a low speed. Be very careful during this part because the syrup is extremely hot and can cause burns if it splashes on your skin. After all the syrup is added turn the mixer to high and beat the mixture for about ten minutes or until it becomes very thick and looks like shiny marshmallow fluff. This is the point where you add your vanilla extract and the pinch of salt along with the cocoa powder if you want the center to be chocolate flavored. Keep beating the mixture until it loses some of its shine and starts to feel heavy on the beaters of your mixer.
Now you will pour this thick fluffy nougat into your prepared pan and use a spatula to spread it out into an even layer. Let the pan sit on your counter at room temperature for at least four hours or even overnight so that the nougat can set and become firm enough to cut. When the nougat is ready use the parchment paper to lift the whole block out of the pan and place it on a cutting board. Use a sharp knife to cut the block into long bars or small squares depending on what size you prefer for your snacks. If the knife gets sticky you can rub a little bit of butter or oil on the blade to help it slide through the fluffy center more easily.
The final step is the chocolate coating which is what makes these bars look and taste like the real thing. Melt your milk chocolate chips and the shortening in a microwave safe bowl in thirty second intervals while stirring in between until the mixture is completely smooth. Use a fork to dip each piece of nougat into the melted chocolate making sure to coat every side and then lift it out and let the extra chocolate drip off. Place the finished bars back onto a piece of parchment paper and let them sit until the chocolate is hard and dry to the touch. You can put them in the refrigerator for twenty minutes to speed up this process if you are in a hurry to try one. Once the chocolate is set your homemade musketeer bars are ready to be enjoyed or stored in an airtight container for up to two weeks.
Why This Recipe Is Special
This recipe is special because it focuses on a light and airy texture which is quite rare in the world of homemade candy making. Most people think they have to be a professional chef to make a fluffy nougat but this method proves that anyone with a mixer and a pot can do it. It is a very budget friendly way to make a large amount of candy for a big group of people without spending a lot of money. Because you are making it yourself you can choose to use high quality ingredients like organic eggs or premium chocolate which makes the final result taste much better than a store bought bar. It is also a very versatile recipe because you can change the flavor of the center or the type of chocolate on the outside to match your personal preference. Another great benefit is that these bars do not contain any of the wax or artificial stabilizers found in many commercial candies which makes them feel cleaner and fresher in your mouth.
Extra Tips for Better Taste
If you want to take your candy bars to the next level you can try a few creative ideas to enhance the flavor and the look. One tip is to toast some malted milk powder and fold it into the nougat to give it a deeper and more toasted flavor that reminds people of old fashioned milkshakes. You can also sprinkle a tiny bit of flaky sea salt on top of the chocolate before it dries to create a salty and sweet balance that is very popular right now. If you like dark chocolate you can use that for the coating instead of milk chocolate to make a more grown up version of the treat. Another fun idea is to add a drop of peppermint extract to the nougat during the holidays to make a refreshing chocolate mint bar. Always make sure your eggs are at room temperature before you start because they will whip up to a much larger volume which leads to a lighter and fluffier candy bar.
Final Thoughts
Making these homemade musketeer candy bars is a wonderful journey that starts with simple pantry staples and ends with a professional looking dessert. It is a process that requires a little bit of patience but the reward of biting into that soft fluffy center is worth every minute of work. Whether you are making them for yourself or as a gift for a loved one you will find that the homemade version is far superior to anything you can find at the store. We hope you have a great time in the kitchen and enjoy every sweet bite of your creation.
Nutrition Details
Below is a table showing the estimated nutrition for one serving of these homemade bars based on a total of twenty small bars.
| Nutrition Item | Amount Per Serving |
| Calories | 185 calories |
| Total Fat | 7 grams |
| Saturated Fat | 4 grams |
| Cholesterol | 2 milligrams |
| Sodium | 35 milligrams |
| Total Carbohydrates | 32 grams |
| Dietary Fiber | 1 gram |
| Total Sugars | 28 grams |
| Protein | 2 grams |
Disclaimer
Please remember that everyone has a different body and different health needs so the way your body reacts to sugar and chocolate might be different from others. This recipe is intended for occasional enjoyment as a treat and should be part of a balanced diet. If you have any medical conditions like diabetes or allergies please talk to your doctor before trying new recipes with high sugar content. The nutritional values are only estimates and can change depending on the specific brands of ingredients you choose to buy at your local store.